If you want to build a great collection of creative high quality photos, you are probably taking many pictures. Only a small portion of these make it to your final photo collection. Managing all taken photos, choosing the few final picks can be quite tedious. But it is worth the effort! Fortunately photo management software makes it much easier. Below we discuss how Photo Sense helps you manage photos on Mac.
Why do you need to take many photos?
There are many factors working against you when taking photos. Here are just a few examples of what can go wrong:
- Your hand shakes, resulting in a blurry photo
- A sudden wind gust blurs trees in your landscape shot
- A stranger or a car suddenly enters your composition
Things get even more interesting with portraits. Chances to ruin a photo grow dramatically with every added person. Anybody can blink, sneeze, make a strange face expression, look in the wrong direction, etc. The more people there are, the more duplicate shots you need for a reasonable chance to end up with a single good photo.
And then there are difficult shooting conditions or subjects. For example, taking photos from a moving car, in darkness, or shooting quickly moving subjects. Situations when you don’t have much control over the photo composition when shooting. The best thing you can do is make as many shots as possible, to increase the chance that some of them are successful. Keep the final selection for later, using photo management software.
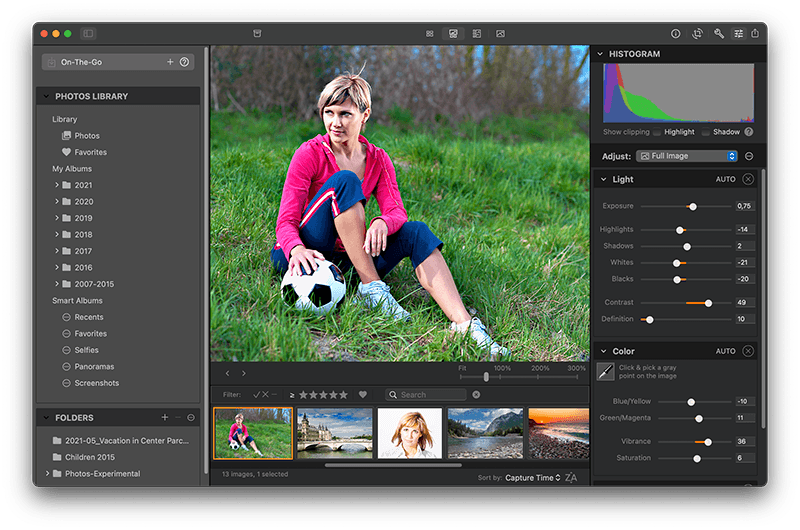
Manage photos on Mac with Photo Sense
Once you have all your photos on Mac, manage them efficiently with Photo Sense. Quickly go through all shots, compare them side-by-side, and choose the best ones.
Select the source with your new photos
Photo Sense works directly with your Apple Photos (iCloud) Library, or image files on your Mac. Choose what is more convenient for you:
- Library: Import all photos to the Apple Photos app. Create an album for this shoot, and add all the new photos there. Photo Sense can access this album directly to manage its photos.
- Files: Move all photos to a separate folder. Add this folder to Photo Sense, to the “Folders” panel on the bottom of the left sidebar.
Initial clean-up
Now with all new photos shown in Photo Sense, quickly go through them and reject the obvious failures.
You can of course start deleting unwanted photos immediately. However, there is a better, safer way in Photo Sense. It helps against making premature decisions that are difficult to undo, and that you may regret later. Instead of deleting unwanted photos immediately, flag them as rejected. And vice versa, flag the best photos as picked to find them easily.
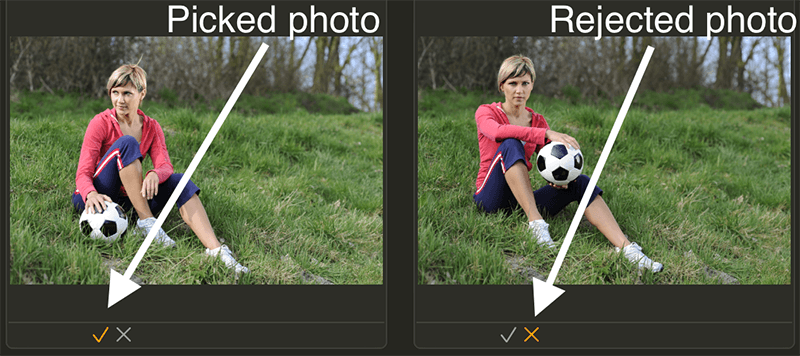
You can pick or reject photos in Browser or in Preview. Using controls under the images, the app menu, or keyboard shortcuts. Keyboard shortcuts are very handy to go through many images quickly. Select photos using arrow keys, combine them with Shift or Command to select multiple items. Then press “P” to pick them, and “R” (or “X”) to reject them.
It is convenient to hide rejected photos at this point. On the Browser toolbar, enable a filter showing only picked and unpicked images, hiding the rejected ones.
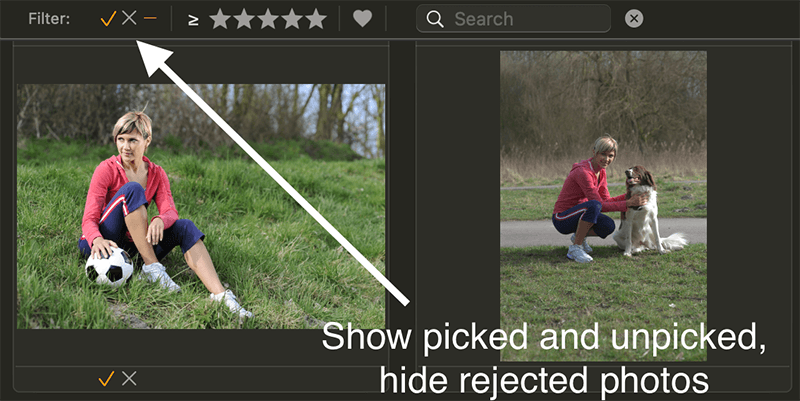
Now rejected photos instantly disappear both from Browser and Preview. And you can focus on the photos still requiring your attention. You can disable filters at any time to check the rejected photos again.
In addition to the “pick” / “reject” flag, you can assign a star rating, and mark photos as “favorite”. Filter and sort images based on any of these properties to manage photos efficiently.
This way, going through all your photos in Browser or Preview, you can quickly get rid of the obvious failures. For example, photos with a poor composition, strong blur, etc.
Compare photos side-by-side
After the initial clean-up, you probably have many versions of the few good photos you want to keep. Now is the time to inspect them closely and choose the most successful shots.
Select a number of similar photos in Browser, and hit space or “P” on the keyboard to compare them side-by-side in Preview. Or use the window layout controls on the toolbar.
Preview shows all the photos selected in Browser. It is recommended to limit the number of compared photos depending on your Mac’s screen size. It is rarely useful to preview more than about 10 images at a time.
You can zoom and pan photos shown in Preview to compare details. Individually if composition is different. Or sync the zoom and position in all shown photos if their composition is similar.
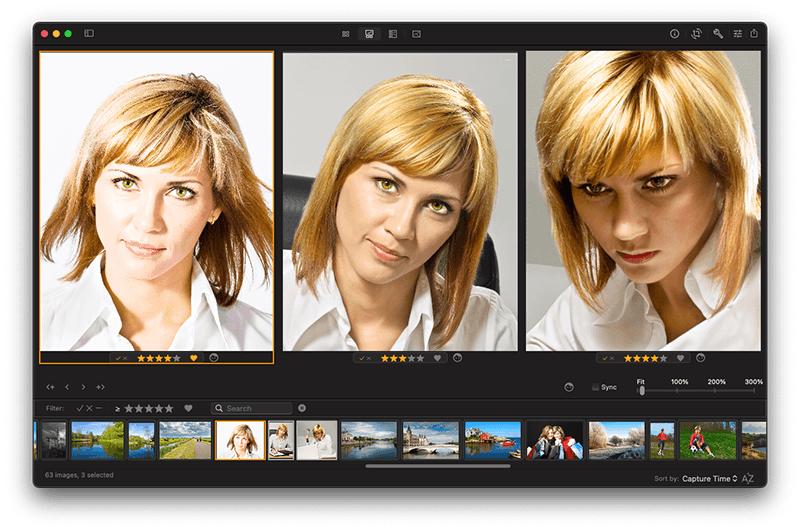
When inspecting photos with people, you will probably want to compare their faces. Photo Sense has a special “Zoom on the Next Face” button on the Preview toolbar. Click it to zoom all photos on the next detected face.
With multiple people Photo Sense may zoom photos on faces of different people. To compare how the same person looks on different photos, click the button “Zoom on the Next Face” below every image till it shows the required face.
Just like in Browser, you can assign the “pick” / “reject” flag, star rating, and mark photos as favorites in Preview. To speed it up, use the keyboard arrow keys to select a photo, and the same shortcuts as in Browser to mark it.
The filter and sort order defined in Browser are also applied to Preview. For example, it is convenient to hide rejected photos using a filter. Photos will disappear as soon as you reject them.
These unique side-by-side comparison, zoom on faces, and filtering tools in Photo Sense enable you to manage photos efficiently on Mac.
Save results
Finally you have chosen the best photos to keep. Or only finished the first round, need to revisit this shoot later again. Anyway, you have done some work, and we highly recommend saving the results.
Photo Sense doesn’t save your changes automatically, because it may take a long time for many photos, and may slow down your workflow. Instead, Photo Sense lets you decide when and what to save.
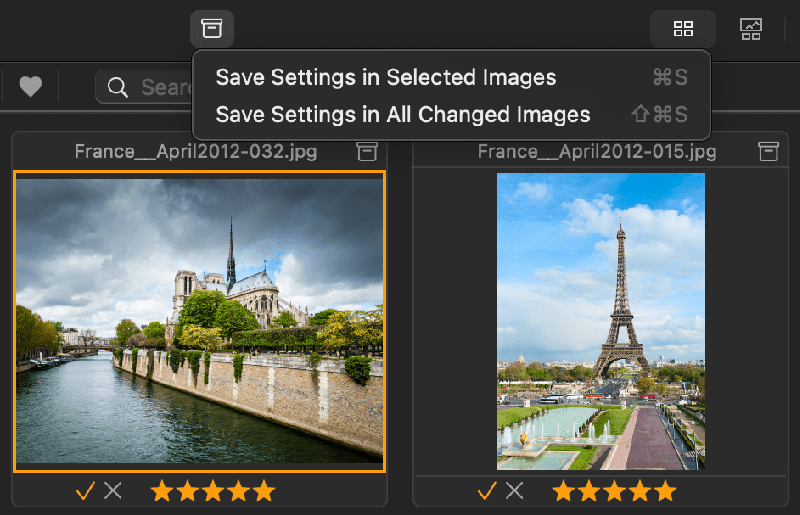
Use the toolbar, app menu, or context menu to save changes in the selected or all changed images.
After the results are saved, you can quit Photo Sense without losing your work. When you open the same photos in Photo Sense again, it restores all the changes. You can continue to manage photos on Mac from where you left! If you work with the Photos Library synchronised over iCloud, you can even continue managing these photos on another Mac!
Delete rejected photos
When you are done choosing the best photos to keep, you may want to delete rejected photos. This saves storage space on your Mac or on the cloud.

Delete either certain selected photos, or all rejected photos at once. Use the menu “Image” → “Delete Selected Photos”, “Image” → “Delete Rejected Photos”, or the Browser context menu.
Edit the best photos
You may want to edit the chosen photos to enhance their look. Photo Sense offers a rich set of tools to achieve the best results quickly. It includes a RAW processor, batch processor, and automatic-first enhancement. For more details please see Edit photos on Mac with Photo Sense.